WireGuard PVE Openwrt 组网
关于折腾 WireGuard、openwrt 的详细记录。
背景
工作期间租房子住,只租的起一间卧室,卧室里面有一台大学自己配的 mini ITX 主机,还有一台去年购买的 N100 小主机,N100 有两个网口,一直用它来做软路由。 mini ITX 装了 PVE、Windows、黑苹果三个系统。和大多数人一样,Windows 用来打游戏,黑苹果写代码,PVE 用来部署 k8s。
实际上 N100 小主机我也给装了 PVE,主要是觉得将整个 N100 刷入 openwrt 太浪费了, openwrt 对资源消耗的很少,一般 1c 1g 就足够了,但是这台 N100 有 4c 16g,所以我在 N100 的 PVE 内创建了 openwrt 和 ubuntu 两个虚拟机。
现在我想出门在外的时候也能够通过 WireGuard 对卧室内的网络进行访问,组建 WireGuard 需要公网 ipv4 (ipv6 还没捣鼓过,后面再说吧)。卧室没有公网,所以在阿里云租了两年 ECS。
准备使用阿里云 ECS 作为 WireGuard 中继节点,在 N100 上部署 WireGuard 实现组网。
网络

N100 两个网口,其中 eth0 直接接入家庭路由器的网线,eth1 接入了一个交换机,openwrt 会将 eth1 设置为它所管理的局域网 (br-lan: 172.16.0.0/16) 物理接口。 卧室内的 Wi-Fi 设备也接入了 eth1,Wi-Fi 使用了中继模式,连接到 Wi-Fi 和交换机的设备网络都会由 openwrt 统一管理。
- 在 N100 PVE 部署 wireguard 之后,非本地设备就可以直接访问 N100 PVE 管理界面。
- 在 N100 PVE 中的 openwrt 部署 wireguard 之后,非本地设备可以直接访问 openwrt 构建的局域网(172.16.0.0/16)内所有子设备。
部署流程
Step1. ECS 服务器
安装 wireguard
1
sudo apt-get install wireguard -y
创建后续需要的 keys
创建一个目录,用来保存接下来需要用到的 wireguard public/private keys.
1
wg genkey | tee private.key | wg pubkey > public.key
这是我需要用到的 keys
1
2
3
4
5
6
7
8
9
10
11
12
-rw-r--r-- 1 root root 45 May 21 21:37 ecs-private.key
-rw-r--r-- 1 root root 45 May 21 21:37 ecs-public.key
-rw-r--r-- 1 root root 45 May 21 21:40 iphone-private.key
-rw-r--r-- 1 root root 45 May 21 21:40 iphone-public.key
-rw-r--r-- 1 root root 45 May 22 16:43 mac-private.key
-rw-r--r-- 1 root root 45 May 22 16:43 mac-public.key
-rw-r--r-- 1 root root 45 May 25 14:09 n100-pve-private.key
-rw-r--r-- 1 root root 45 May 25 14:09 n100-pve-public.key
-rw-r--r-- 1 root root 45 May 25 15:55 openwrt-private.key
-rw-r--r-- 1 root root 45 May 25 15:55 openwrt-public.key
-rw-r--r-- 1 root root 45 May 25 20:29 pixel-private.key
-rw-r--r-- 1 root root 45 May 25 20:29 pixel-public.key
创建 wireguard 配置文件
配置文件存储目录 /etc/wireguard/wg0.conf
1
2
3
4
5
6
7
8
9
10
11
12
13
14
15
16
17
18
19
20
21
22
23
24
25
26
27
28
29
30
31
32
33
[Interface]
PrivateKey = <ecs-private.key>
Address = 10.1.1.1/32
ListenPort = 51820
SaveConfig = false

PostUp = iptables -A FORWARD -i wg0 -j ACCEPT && iptables -t nat -A POSTROUTING -o eth0 -j MASQUERADE
PostDown = iptables -D FORWARD -i wg0 -j ACCEPT && iptables -t nat -D POSTROUTING -o eth0 -j MASQUERADE

# MacBookPro 14
[Peer]
PublicKey = <mac-public.key>
AllowedIPs = 10.1.1.3/32

# N100 PVE
[Peer]
PublicKey = <n100-pve-public.key>
AllowedIPs = 10.1.1.2/32

# openwrt
[Peer]
PublicKey = <openwrt-public.key>
AllowedIPs = 10.1.2.1/32, 172.16.0.0/16

# iPhone
[Peer]
PublicKey = <iphone-public.key>
AllowedIPs = 10.1.1.4/32

# Pixel
[Peer]
PublicKey = <pixel-public.key>
AllowedIPs = 10.1.1.5/32
在设置 PostUp 和 PostDown 的时候应该要注意服务器使用的网口名字是否正确。 需要注意的是,不能够粗暴的将这些 Peer 的 AllowedIPs 都设置为 10.0.0.0/8,可能会导致 WireGuard 不知道该将流量传递给哪个 Peer,所以写配置的时候要明确哪些流量能访问哪些 Peer 对于需要访问 172.17.0.0/16 的请求,我们将它转给 openwrt 节点去处理。
启动 WireGuard,并将它设置为开机启动
1
2
wg-quick up wg0
systemctl start wg-quick@wg0
配置网络
找到阿里云服务器 ECS / 安全组 / 访问规则,增加一个入方向的 UDP 规则,放行 51820 端口给所有 IP。

Step2. N100-PVE
安装 WireGuard 过程和 ECS 的保持一致,给 N100-PVE 安装 WireGuard 主要是因为 openwrt 不能够管理 N100-PVE 的网络,这是因为 N100-PVE 的网络是由家庭的路由器分配的,openwrt 作为 N100-PVE 内部的虚拟机,只能决定 eth1 网口的网络。 创建 WireGuard 配置文件放到 /etc/wireguard/wg0.conf
1
2
3
4
5
6
7
8
9
10
[Interface]
Address = 10.1.1.2/32
ListenPort = 51820
PrivateKey = <n100-pve-private.key>

[Peer]
PublicKey = <ecs-public.key>
Endpoint = <ecs-public-ip>:51820
AllowedIPs = 10.0.0.0/8
PersistentKeepalive = 25
启动 WireGuard,并将它设置为开机启动
1
2
wg-quick up wg0
systemctl start wg-quick@wg0
Step3. Openwrt 配置 WireGuard
创建 WireGuard 网络接口
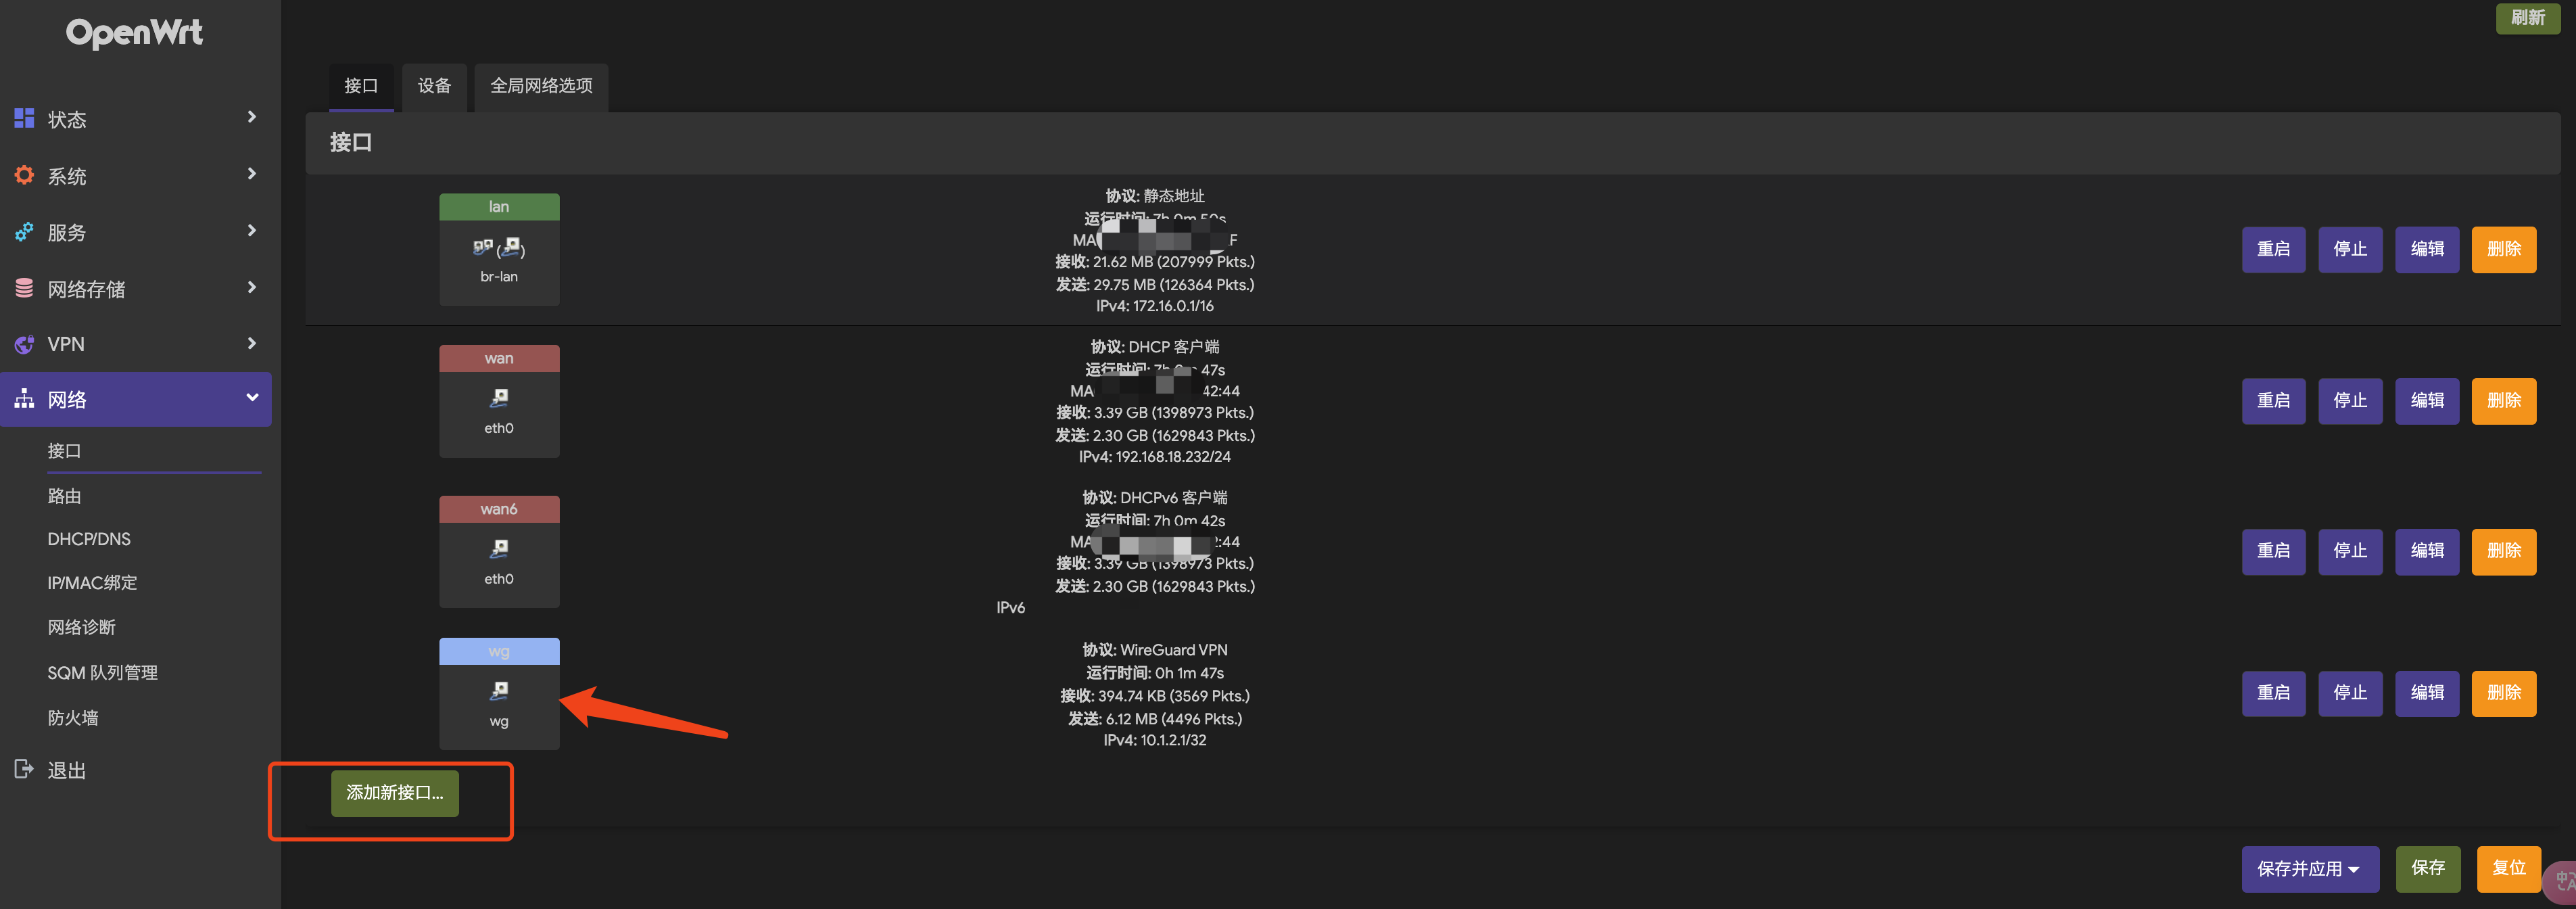
下面这张图已经创建完毕了,点击添加新接口时选择 WireGuard 协议,没有这个协议需要去编译固件,或者在线下载。
填写常规设置
在常规设置中,将前面生成的 keys 粘贴过来,监听端口不需要特别指定

填写对端
在对端设置中,将 ECS 的公钥填写好,另外需要注意的是勾选 ✅ 路由允许的 ip,keep alive 也要写上,保存即可。

WireGuard 防火墙
在 WireGuard 接口的防火墙设置页面,创建一个名为 wg 的防火墙,然后保存该接口配置,并重启接口。

找到 openwrt/网络/防火墙,按照下述方式配置。


防火墙配置完毕后,以防万一,可以再重启一次 wg 接口。
Step3. 客户端
虽然 WireGuard 没有服务端客户端的概念,只有对等端概念,但是这里为了容易理解,可以把 ECS 作为中转点,iPhone、Mac、Pixel 这些设备作为客户端。 客户端的配置很容易,以 Mac 为例,需要访问 openwrt 管理的 172.16.0.0/16 以及 WireGuard 的 10.0.0.0/8 这两个网段,那么就按照下述配置填写:
1
2
3
4
5
6
7
8
9
[Interface]
PrivateKey = <mac-private.key>
Address = 10.1.1.3/32

[Peer]
PublicKey = <ecs-public.key>
AllowedIPs = 10.0.0.0/8, 172.16.0.0/16
Endpoint = <ecs-public-ip>:51820
PersistentKeepalive = 25
其他设备同理,下面是 Pixel 设备在接入 WireGuard 后访问 ITX PVE 的效果
![]()
排查测试
通过 Mac 对 ITX 主机内的 ubuntu-07 进行路由测试
1
2
3
4
5
❯ traceroute 172.16.1.107
traceroute to 172.16.1.107 (172.16.1.107), 64 hops max, 52 byte packets
 1  bogon (10.1.1.1)  672.748 ms  24.775 ms  36.073 ms
 2  bogon (10.1.2.1)  37.611 ms  42.253 ms  44.669 ms
 3  bogon (172.16.1.107)  87.135 ms  43.343 ms  41.095 ms
像预期的那样,Mac 发起的请求首先到达阿里云 ECS 节点(10.1.1.1),然后跳转到 openwrt 节点(10.1.2.1),最后通过 openwrt 构建的 br-lan(172.16.0.0/16) 找到了 172.16.1.107。 在进行 WireGuard 配置的时候,如果出现 ping 不通无法访问的情况,可以通过在请求端使用 traceroute 追踪路由,也可以在接收端使用 tcpdump 工具追踪对应的网络接口日志,比如在 ECS 上追踪 WireGuard 创建的 wg0 接口:
1
tcpdump -i wg0